Member-only story
Paint a Watercolor Tree in the Fall
Step by step watercolor tutorial for painting a tree in its autumnal splendor
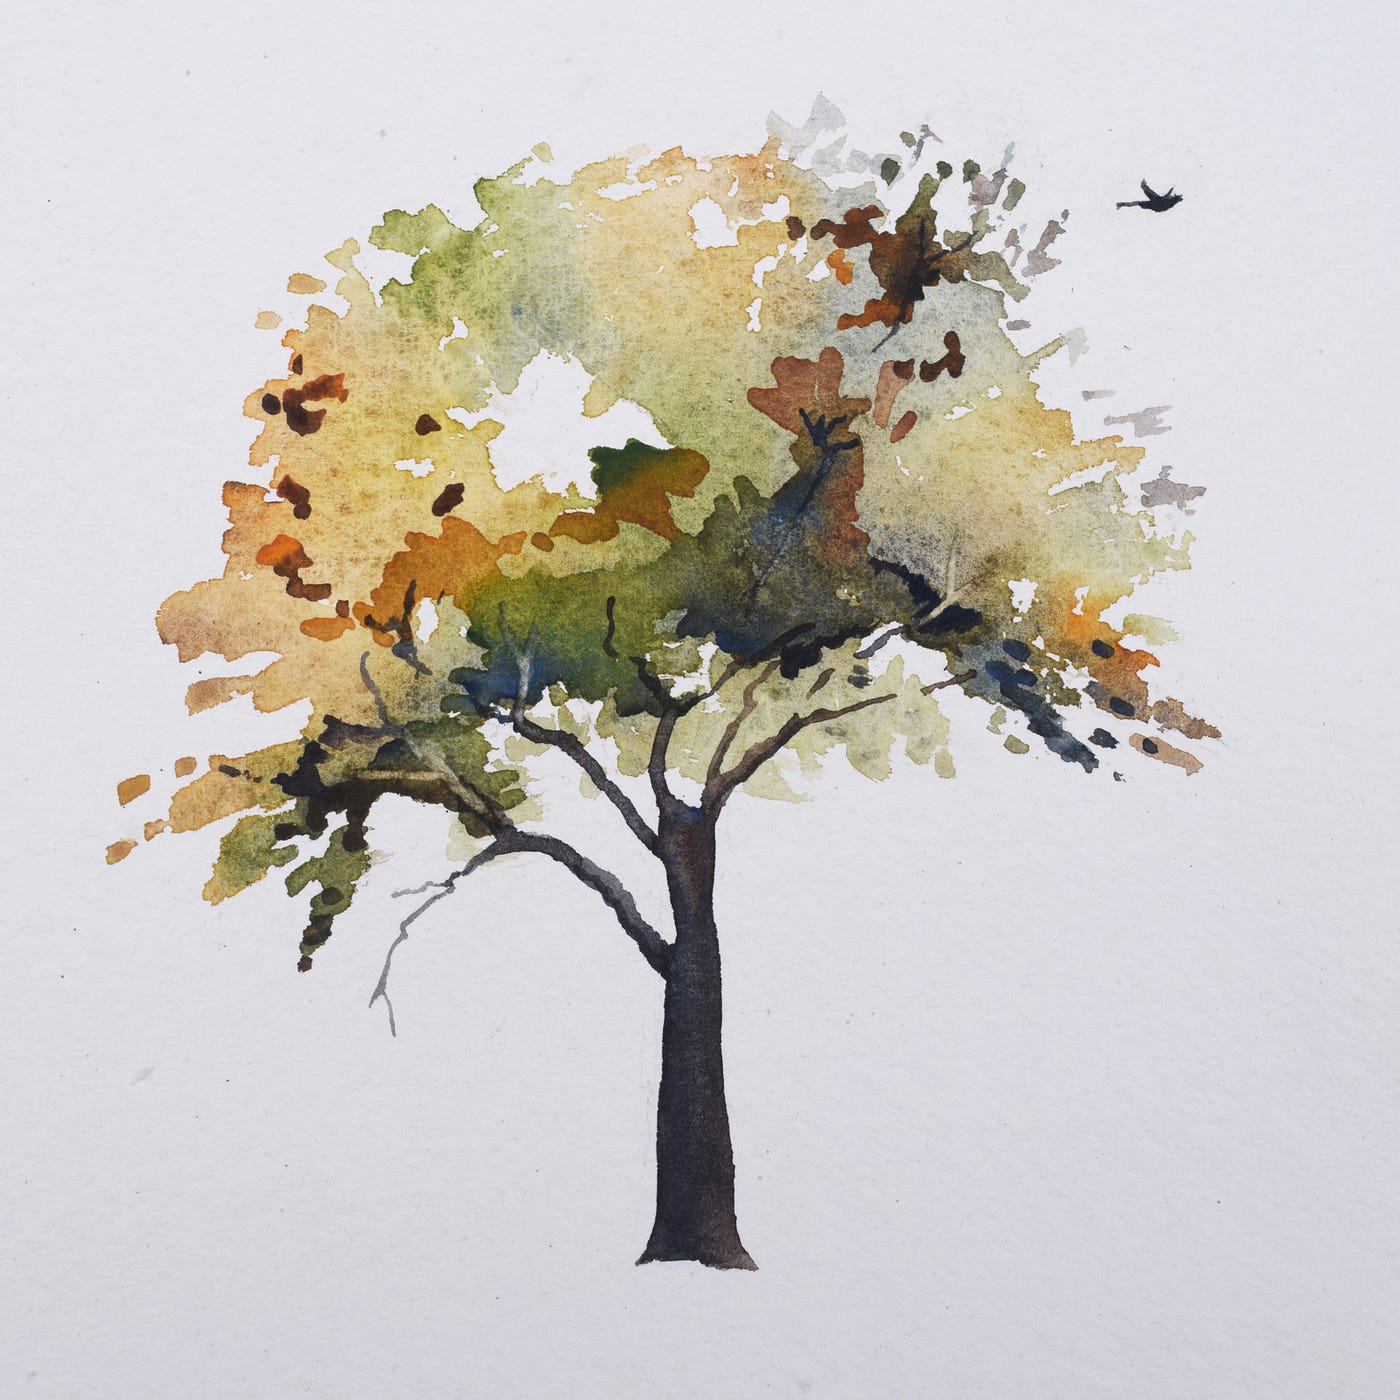
As summer passes and the shades of nature ebb towards beautiful shades of red, yellow and brown, trees become an irresistible subject for painting. In my local park, the beeches and oaks are all on the turn, but it is the maple trees that express this change of season so magnificently.
I think the key to making a successful painting of one of these trees is to attempt to capture the transition, giving you the chance to use an array of shades — from light green to dark brown — to achieve a finished painting that maintains the fullest expression of the palette.
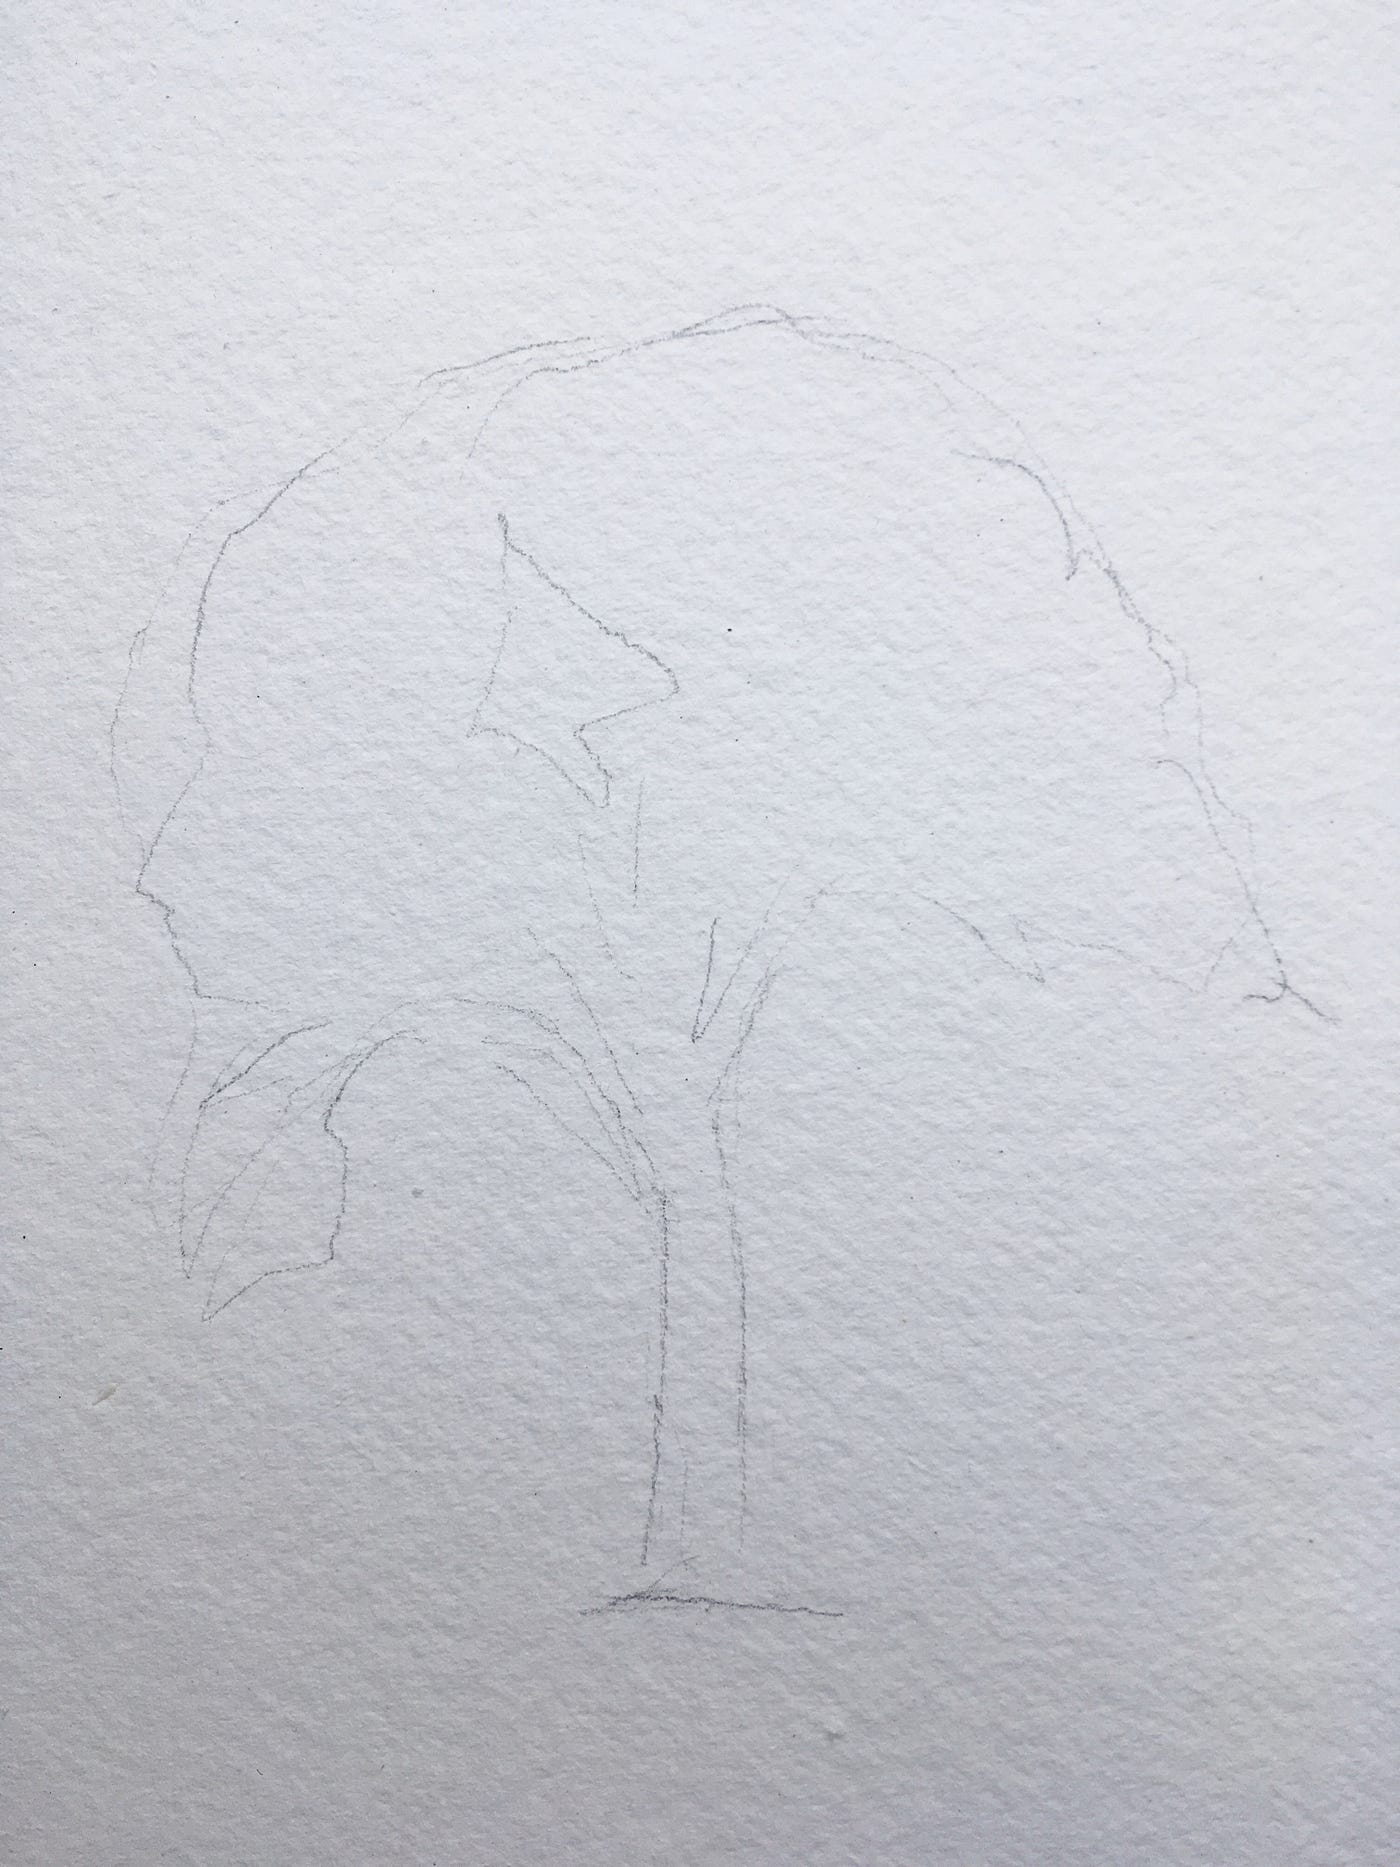
I began this painting by sketching a simple outline of the tree. No need to be too precise here; in fact, as with all stages of watercolor paintings, the more open you are to changes and mistakes along the way, the better the outcome will be.
One of the things I take care to do is mark out an area in the foliage of the tree that I intend to leave blank. After all, trees are not blocks of colour but have many gaps and holes between the branches.